This guide takes you step-by-step through the process of setting up a new Texo-hosted email account in Outlook 2010.
Replace example.com with your domain name
Auto Account Setup (recommended)
Setting up a new email address in Outlook is quick and easy using the Auto Account Setup option. However, reasons to rather use Manual Setup are:
- if you prefer POP, as this automatic configuration defaults to IMAP
- if this is a new hosting account and domain propagation has not completed
1. Launch Outlook 2010
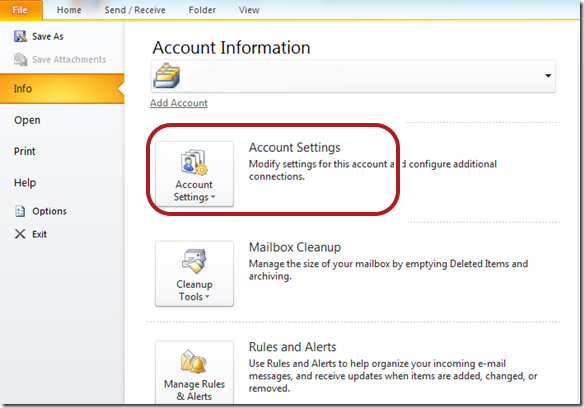
2. Select File from the top menu bar and then Info and Account Settings
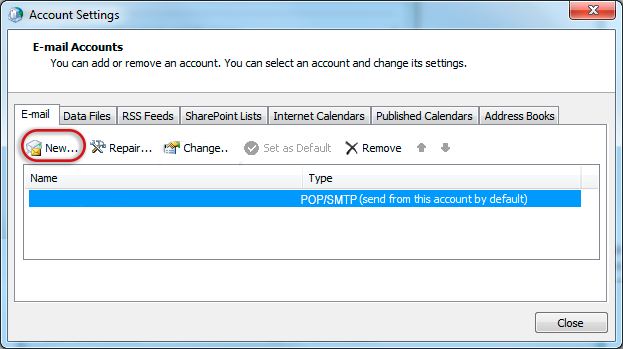
3. On the Email tab, Select New
4. Click to select the Internet E-mail or Email account option > Next
5. In the Add Account box
Enter your details under E-mail Account
- If you’ve lost your password – change it in your Control Panel
- > Next
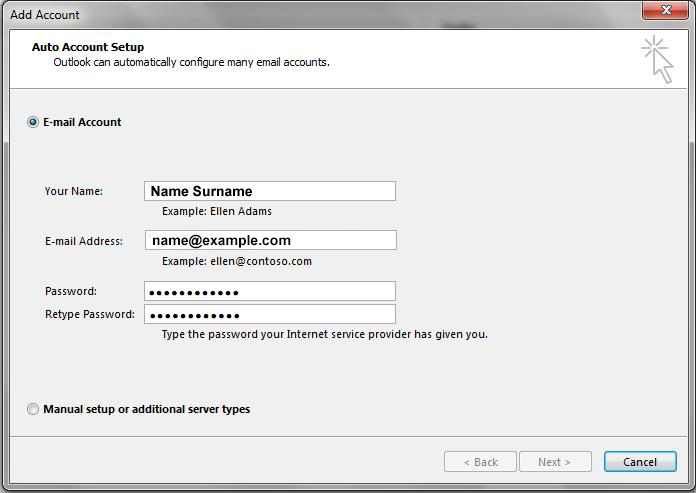
6. Outlook will now automatically configure your account as an IMAP account with all the correct settings.
7. Finish > Close
That’s it!
If this option fails for some reason, try the Manual Account Setup below or refer to our Outlook troubleshooting guide.
Manual Account Setup
If you prefer to use POP you will need to set up the account manually:
1. Launch Outlook 2010
2. Select File from the top menu bar and then Info and Account Settings
3. On the Auto Account Set-up screen, select Manual setup or additional server types. > Next
Choose email service
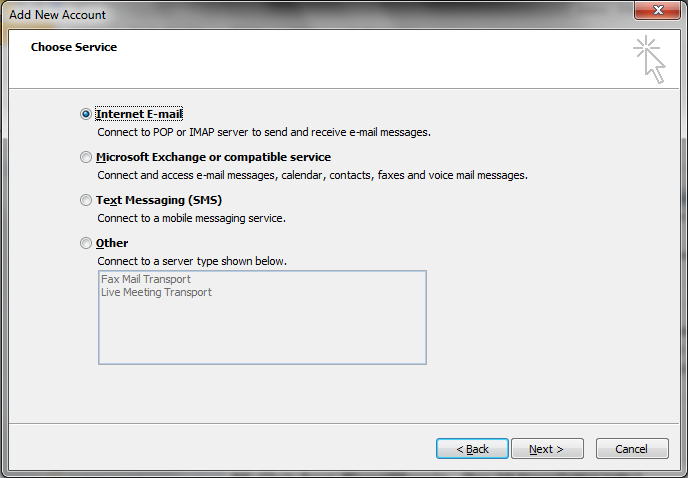
4. Select Internet E-mail, then select Next
Email settings
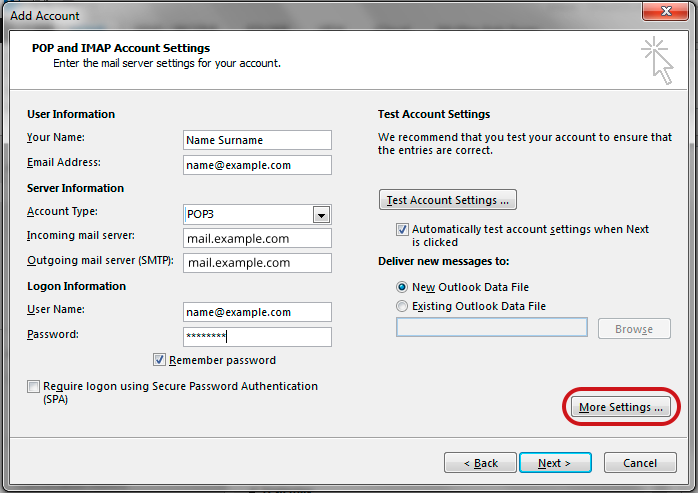
5. Enter all the relevant details:
- Account type: POP or IMAP
- Incoming mail server: mail. followed by your domain name e.g. mail.example.com*
- Outgoing mail server (SMTP): mail. followed by your domain name e.g. mail.example.com*
- User Name: ensure you fill in your entire email address as the username
- For new hosting accounts, use the IP address instead of the Incoming & Outgoing mail servers
- Select the More Settings… button.
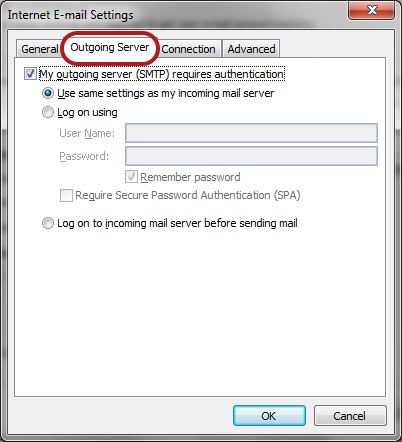
Outgoing Server Settings
6. Select the Outgoing Server tab and ensure that the My outgoing server (SMTP) requires authentication check box is selected, as well as Use same settings as my incoming mail server.
Advanced Settings
7. Select the Advanced tab
8. Check these settings:
- The Incoming server port for IMAP is 993 and POP is 995
- Use the following type of encrypted connection is SSL
- The Outgoing server (SMTP) port is set to 465
- Use the following type of encrypted connection is SSL
9. Select OK, then Next and Finish.
10. Your Outlook mail program should now be set up to send and receive mail.