Category: Email Setup Guides

  • How to set up email in Outlook 2013

    This guide takes you step-by-step through the process of setting up a new email account in Outlook 2013.

    Replace example.com with your domain name

    Auto Account Setup (recommended)

    New email account set up with Outlook is quick and easy using the Auto Account Setup option. However, reasons to rather use Manual Setup are:

    • if you prefer POP, as this automatic configuration defaults to IMAP 
    • if this is a new hosting account and domain propagation has not completed
    1. Launch Outlook
    2. Select File on the top left menu bar
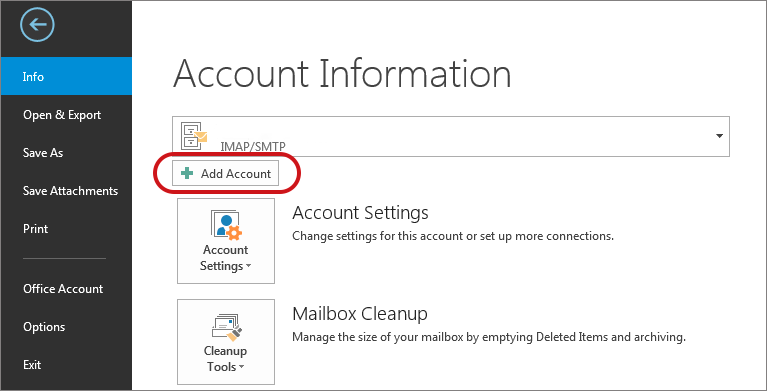
    3. Select the Add Account button in the middle of the screenoutlook2013-add-account1
    4. Enter your details on the Auto Account Set-up screen > Next
      • If you’ve lost your password – change it in your Control Panel.
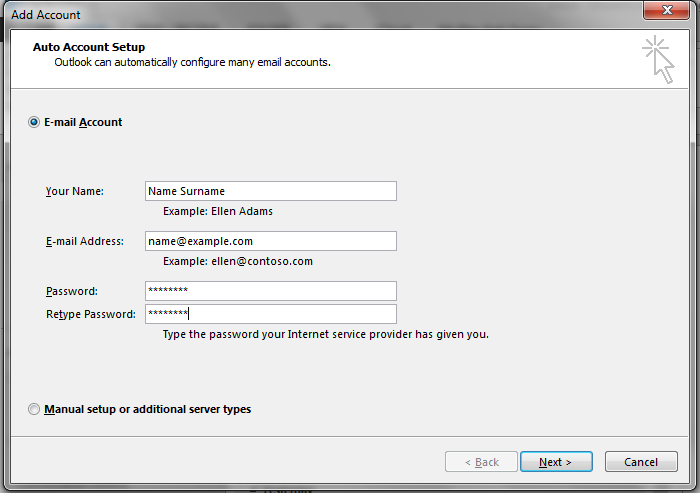
      outlook 2013 auto account setup

    5. Outlook will now automatically configure your account as an IMAP account with all the correct settings.

    That’s it!

    If this option fails for some reason, try the Manual Account Setup below or refer to our Outlook troubleshooting guide.

    Manual Account Setup

    If you prefer to use POP , or your domain has not propagated yet, you will need to set up the account manually:

    1. Launch Outlook, choose File > Account Settings > Add Account (as above)
    2. Choose Manual Setup or additional server types > Nextoutlook2013-manual
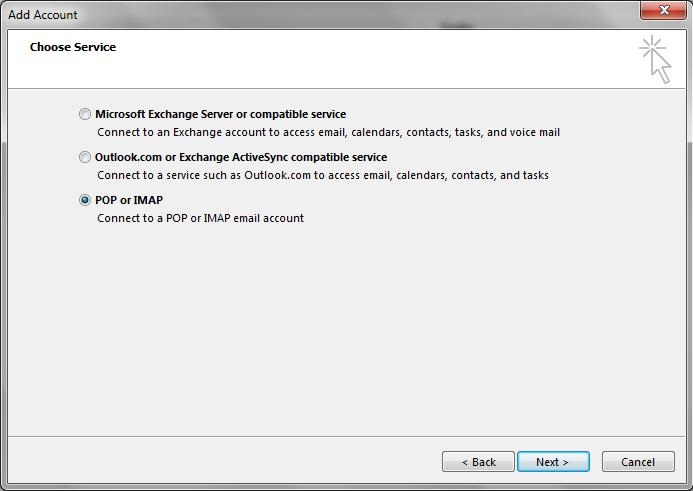
    3. Select POP or IMAP > Next

      Account settings

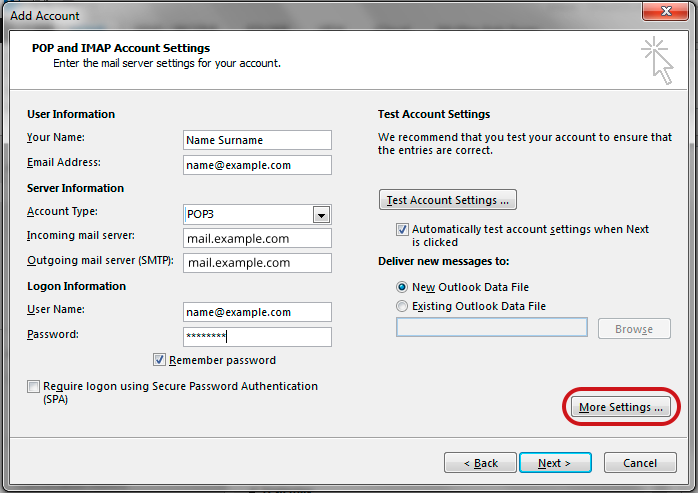
    4. Enter all the relevant details:
      • Account type: POP or IMAP
      • Incoming mail server: mail. followed by your domain name e.g. mail.example.com*
      • Outgoing mail server (SMTP): mail. followed by your domain name e.g. mail.example.com*
      • User Name:  ensure you fill in your entire email address as the username
      • For new hosting accounts, use the IP address instead of the Incoming & Outgoing mail servers
      • Select the More Settings… button.

      outlook-manual-setup

      Check Outgoing Server settings

    5. Select the Outgoing Server tab
      • Ensure that the My outgoing server (SMTP) requires authentication checkbox is ticked
      • Ensure that you have selected Use same settings as my incoming mail server
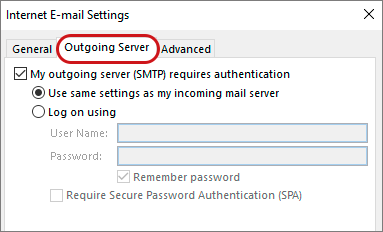
      outlook2013-outgoing-server

      Check Advanced SMTP settings

    6. Select the Advanced tab and ensure that your settings are as below for either IMAP or POP:
      •  Incoming server: 995 (POP) or 993 (IMAP)
      • Use the following type of encrypted connection: SSL
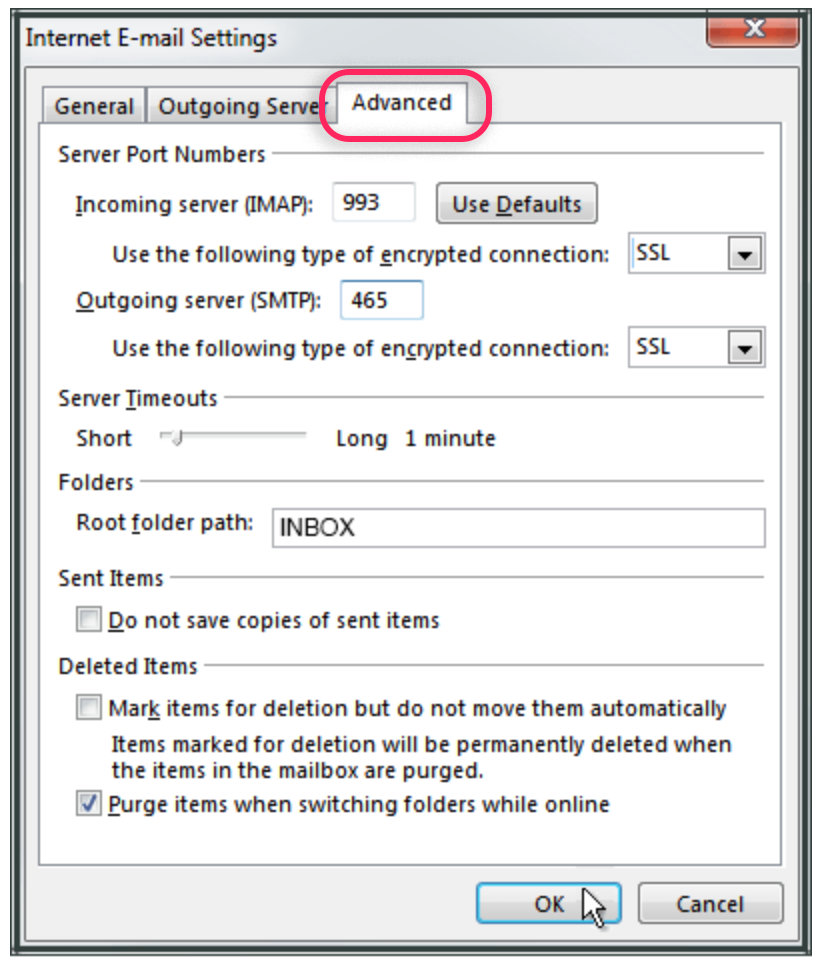
      • Outgoing server (SMTP): 465
      • Use the following type of encrypted connection: SSL
    7. Click OK and then Next.
    8. Let the test complete and then click Close
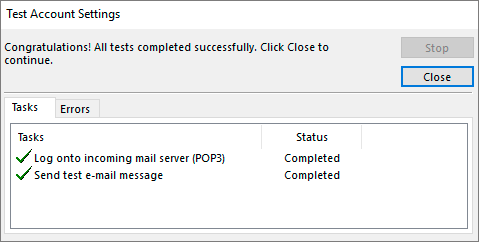
      outlook2013-test-complete

    You’re all set!

  • Outlook for Outlook 2016 or Microsoft 365

    This guide takes you step-by-step through the process of setting up a new email account in Outlook 2016 or Outlook for Microsoft 365

    Replace example.co.za with your domain name.

    1. Launch Outlook
    2. Select File on the top left menu bar

    3. Select the Add Account button in the middle of the screen, then Account Settings

      outlook2013-add-account1

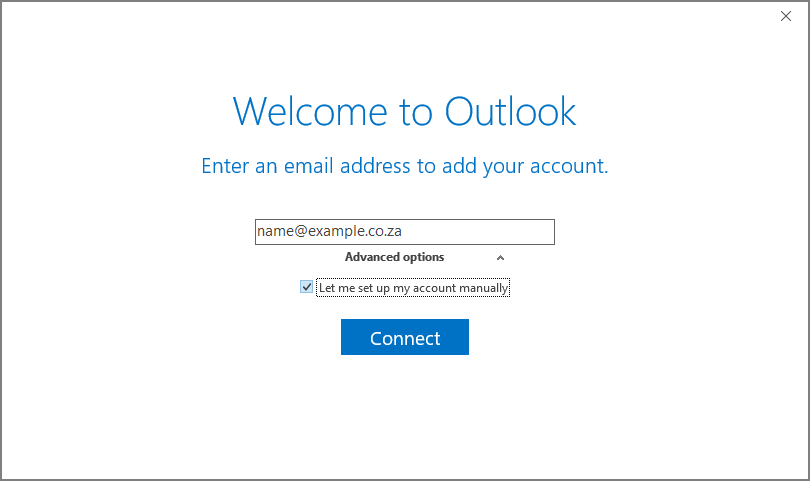
    4. Insert your email address

    5. Select Advanced options, then select Let me set up my account manually  > Connect

    6. This temporary screen will display

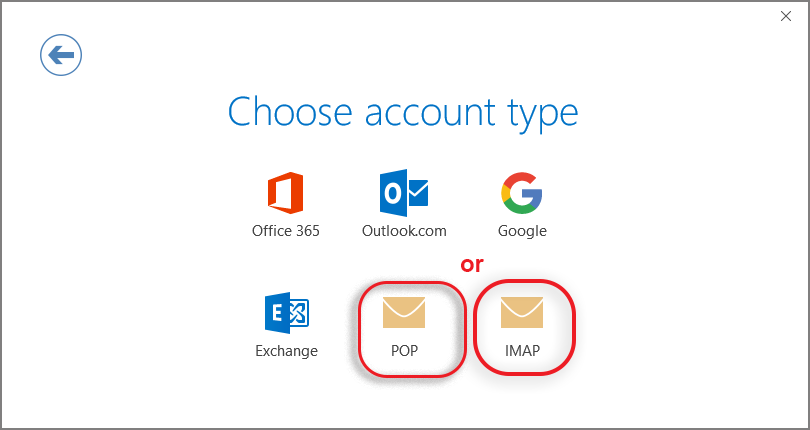
    7. This screen will display the various account options – select POP or IMAP

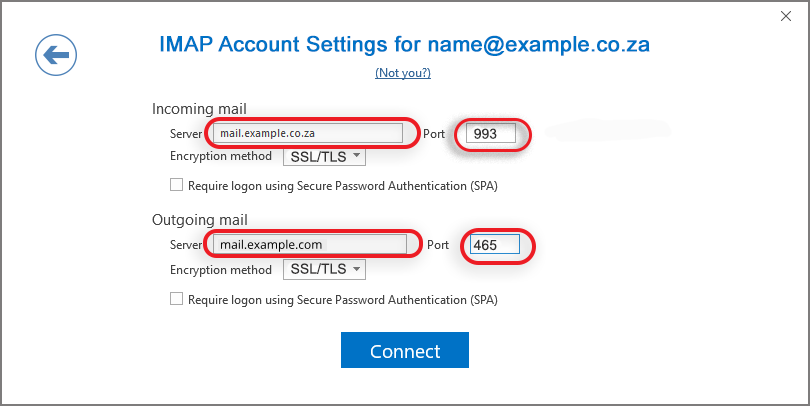
    8. Server Settings: (Note that some versions of Outlook don’t allow you to adjust server settings at this stage. In these cases, complete the account setup and then check your server settings by going to File > Info > Account Settings dropdown > Server Settings).
      • Incoming mail: add mail. before your domain name e.g. mail.example.co.za*
        • Port 993 (or 995 for POP)
        • Encryption method: SSL/TLS
        • Require logon using Secure Password Authentication (SPA) is unticked
      • Outgoing mail: add mail. before your domain name e.g.mail.example.co.za*
        • Change Port to 465 (not 25)
        • Encryption method: SSL/TLS
        • Require logon using Secure Password Authentication (SPA) is unticked
    9. Click Connect
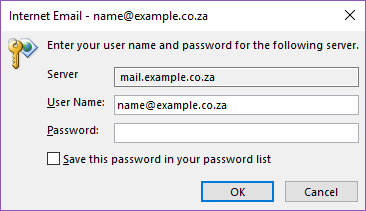
    10. You will now be prompted for the password

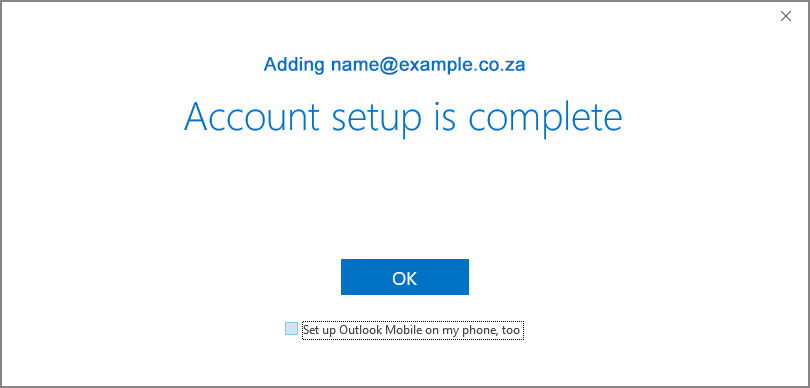
    11. Your setup is complete!

    12. Send a test mail and if there are any errors, refer to our Troubleshooting guides
  • Add your Texo-hosted email account to Gmail

    Your domain email address can be accessed using any mail program, including Gmail.

    The advantages of using Gmail are:

    • the interface may be more familiar to you if you are already using it
    • your mail can be accessed from any online computer or device
    • 15GB of storage is provided per mailbox, which is useful if you want to store a large amount of mail without incurring diskspace charges at Texo.

    Set up your Texo-hosted email

    If you are setting up your email on a cell phone or tablet, refer to: How to set up your email for Gmail on mobile.

    1. Browse to Gmail and log in
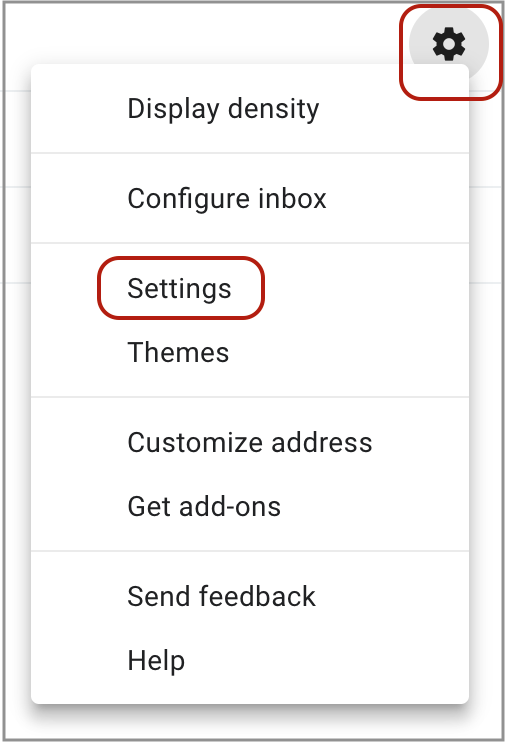
    2. Select the Settings icon from the top-right menu, then choose Settings from the drop-down list:
    3.  Select Accounts and Import
    4. Select Add a mail account
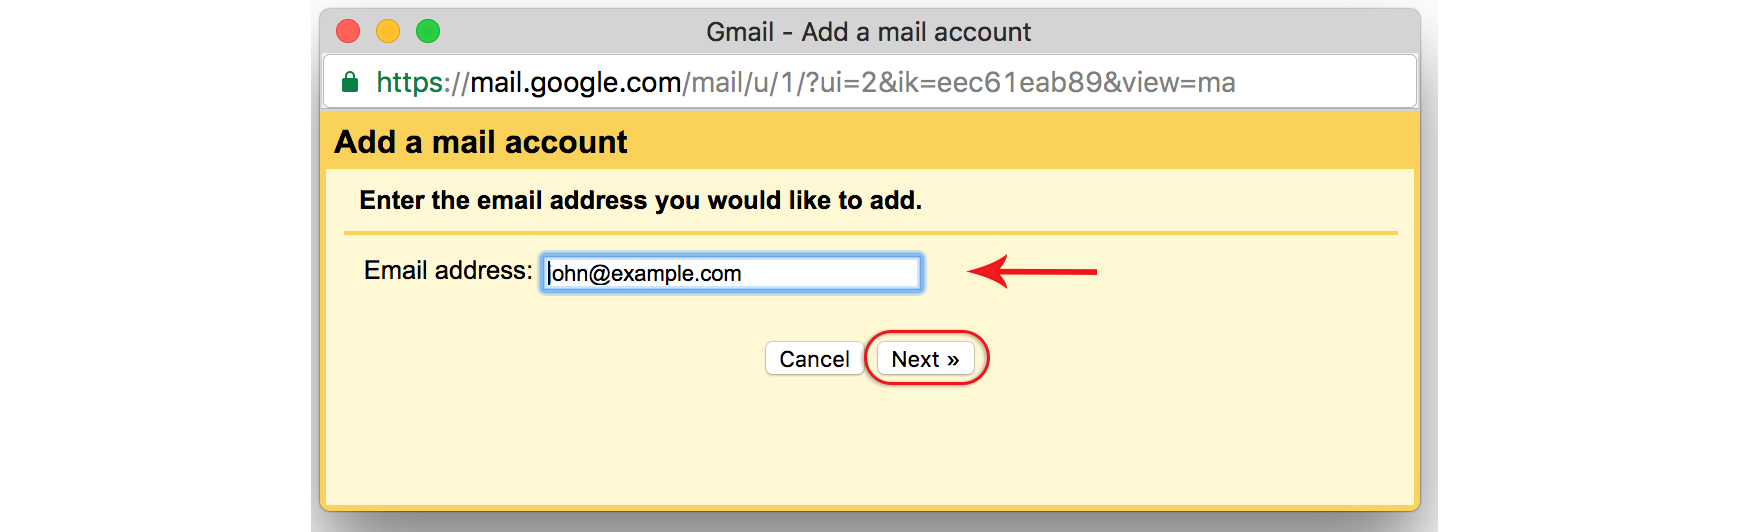
    5. Enter your Email address, select Next
    6. Select the second option and select Next
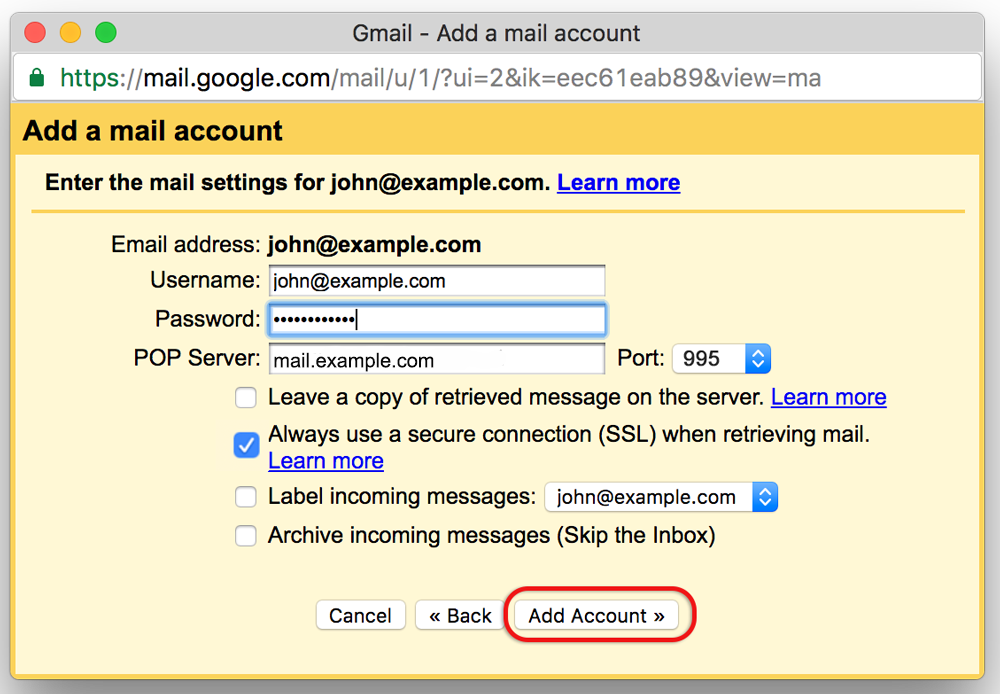
    7. Gmail will automatically add certain settings, but check that:
      • The Username is the full email address
      • The Password is included
      • The POP Server has mail. in front of the domain name e.g. mail.example.com*
      • Port is 995
      • Always use a secure connection (SSL) is checked
    8. Select Add Account
    9. Your account has now been set up to receive your domain email, but you can now continue to set up the account to send mail from your domain. Select Yes and Next
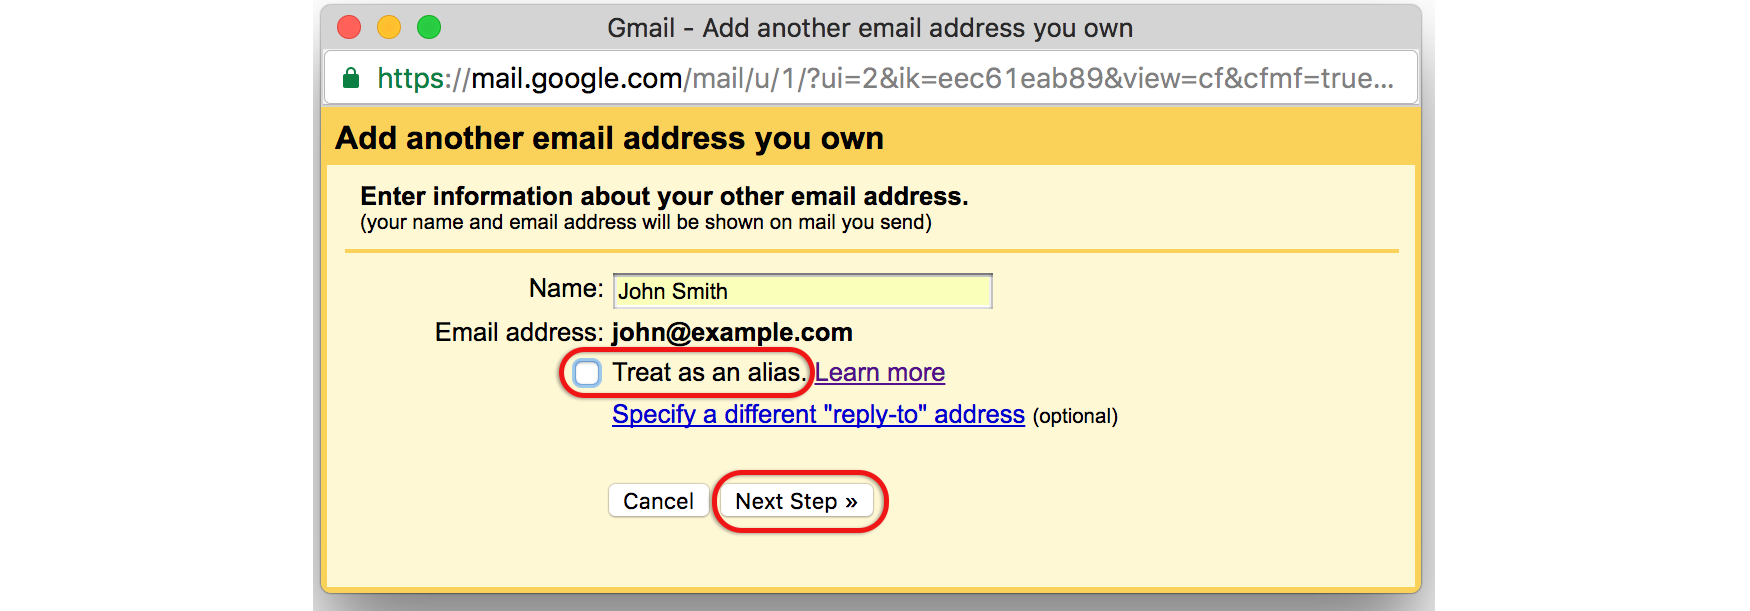
    10. Untick Treat as an alias
    11. Select Next Step
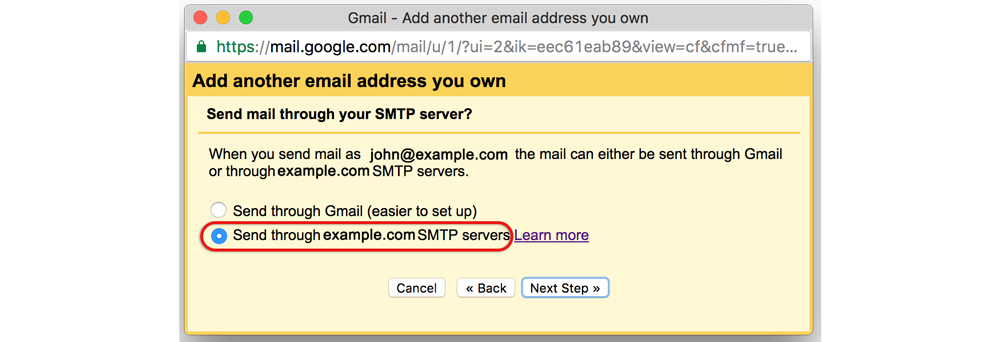
    12. Send mail through your SMTP server? Select the second option. The default setting is to send mail using Gmail SMTP servers, and while this will work, it is not recommended. The reasons are that Gmail servers are more likely to be blacklisted for spam abuse, and certain mail servers will not receive mail from domains that are not associated with that particular server.
    13. The current dialogue box opens up to add the SMTP details. Ensure that:
      1. The SMTP Server has mail. in front of the domain name e.g. mail.example.com*
      2. The Username is the full email address
      3. The Password is included
      4. You select SSL with port 465
        OR
        TLS
        with port 587 (as shown below)
    14. Select Add Account
    15. Gmail will check credentials, and then provide the following dialogue box:
    16. Open your mail and click the link on the confirmation email
    17. Confirmation success! Your domain mail is now set up to be accessed via Gmail.